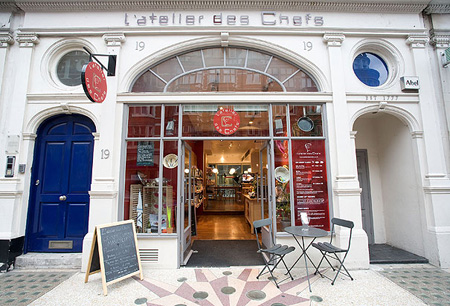
 I was recently invited to join a Master Class in bread making at the L’Atelier des Chefs school in London. It is really a wonderful concept – a wide variety of classes are guided by expert chefs who have top restaurant experience and a great desire for teaching and sharing their knowledge. They have two locations in London - Oxford Circus and St Paul’s - and more in France and Belgium. Offering diverse cuisines and skill levels six days a week, it’s easy to find one that’s right for you. Prices range from just £15 (for their signature Cook, Eat & Run class which promises to teach you to cook a delicious main course in just 30 minutes) to £144 for their four hour Master Class.
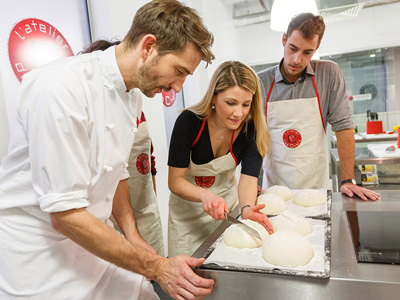
My class was held on a sunny Saturday afternoon at the St Paul’s location, and I was joined by six other eager-to-learn students. It was an eclectic bunch, all ages with mostly beginner to intermediate cooking skills. There was a mother and her teenage son, who seemed less than thrilled to be there; a handsome bearded fellow from the northeastern part of France; two baby boomer types, one woman eager, the other somewhat timid; and a hip twenty-something guy, there on his third visit who shared rave reviews about his previous experiences. We were greeted warmly by the receptionist who presented us with new aprons (to keep as a souvenir) and led us to our classroom. The courses are conducted in a bright state-of-the-art kitchen with a large stainless steel work station which we gathered around to meet our instructor, Chef Daniel Stevens. Initially I had visions of Hell's Kitchen with some fire breathing Gordon Ramsey type instructor who would bark orders and humiliate us for any culinary mistakes
His dry British wit helped lighten the mood and assuage any performance anxiety the students might have, and he promptly gave us a brief overview of what to expect from the class. Daniel’s enthusiasm for bread making was infectious. “I absolutely love bread and this is my specialty! I really enjoy teaching how to make it because this is something that people think they can’t do. The bread master class is such a valuable class for me to teach as a Chef as I can share my passion and knowledge.”
 Before being part of the team at L’atelier des Chefs, Daniel worked at River Cottage, famous in the UK for blazing a trail for ethically-produced ingredients and championing the cause of sustainability. His book, The River Cottage Bread Handbook - filled with easy-to-follow recipes matched with full-color, step-by-step photos - is available on Amazon, and will help any home cook master the art of bread making.
Bread, in one form or another, has been one of the principal forms of food for man from earliest times and is the most widely consumed food in the world. It has been an integral part of our diet for thousands of years, and recent studies suggests humans started baking bread at least 30,000 years ago. Frankly, the trade of the baker is one of the oldest professions in the world (other than the one with which you may be more familiar) and began when primitive people made flat breads by mixing flour and water and placing it in the sun to bake.
According to the CEBP (European Confederation Of Bakers And Confectionary Organizations), the art of bread making evolved and ”it was the Egyptians who are credited with using a "starter" of wild yeast from the air that was kept and mixed with other dough and baked to create a leavened product. Legend has it that a slave in a royal Egyptian household forgot about some dough he had set aside. When he returned, it had doubled in size. Trying to hide the mistake, the dough was punched down furiously and baked. The result was a lighter bread than anyone had ever tasted.”
 My first memory of making bread was with my childhood friend Martha, whose mother made most things from scratch. In keeping with the family’s Scandinavian roots, she often made Swedish Limpa bread and I can still smell the incredible aroma of that freshly baked rye bread, infused with molasses, anise, and orange peel. I was probably 10 or 11 years old when I developed a keen interest in cooking, and especially liked understanding the science behind each recipe – why they worked, or more importantly why they did not. I often would keep a cookbook on the nightstand, to read and study, and mark recipes that I wanted to try. I’ve never had any formal training, so the idea of learning from an experienced chef is very appealing.
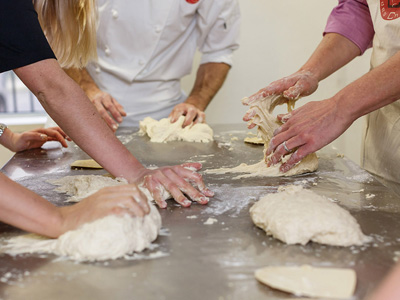
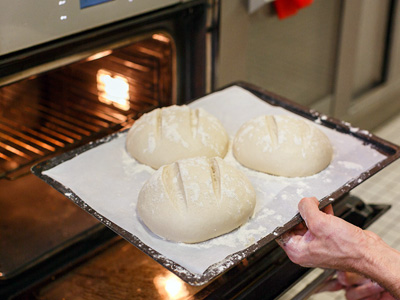
As the clock was ticking, Chef Daniel quickly presented us with large bowls filled with flour, yeast and salt and instructed us to add our premeasured containers of lukewarm water. From these basic ingredients, and under Daniel’s watchful eye and expert tutelage, we would proceed to make English Muffins, Rustic French loaves, Country farmhouse rounds, rosemary-infused focaccia, and jelly filled doughnuts. Within no time, we were mixing, rolling, kneading, rising, shaping, re-rising, and baking bread of all sorts. I was quite pleased with myself as Chef Daniel would glance at my dough with an approving nod, although handling the olive oil slicked focaccia dough proved a bit of challenge. The goal is to scoop the dough up from the bowl and let it drop down on either side of your hand without letting it break, which strengthens it considerably. The secret, I soon discovered, is to keep your finger tight together to create a flat palm to evenly lift the dough. My fingers kept fanning out and the dough nearly ripped open; but an alarmed shout from Daniel saved my focaccia.
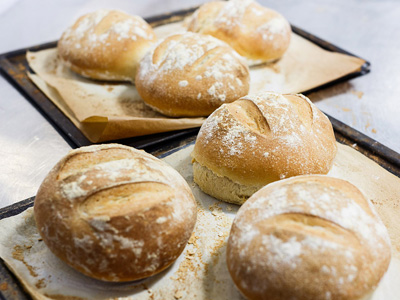
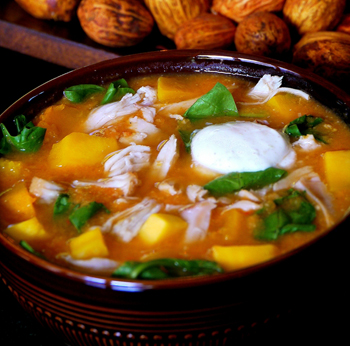
Nothing quite matches the aroma of freshly baking bread wafting from the oven. We were rewarded for our hard work by sampling warm slices of our own creation slathered in butter, and there were plenty of loaves left to take home.We were soon rewarded for our hard work by sampling warm slices of our own creation slathered in butter, and there were plenty of loaves left to take home. By the end of class it felt like cooking with good friends, and many were snapping photos of baked bread and posing in front of their various rustic creations. I thoroughly enjoyed the entire experience and would recommend it to anyone who happens to be in London and looking for a new experience. You can find more information about the courses offered, along with tested recipes on their website - http://www.atelierdeschefs.co.uk. Although all the breads were delicious and rather easy to make, I particularly loved Daniel’s recipe and method for making focaccia bread. It’s easy, rustic, and makes a great addition to any meal - and won't cost you your kingdom to make.
Chef Daniel Stevens’ Focaccia Bread
Note: all measurements are metric – which are actually much more accurate and preferred by most professionals. It’s worth investing in a good kitchen scale (I like the one made by OXO) but I have listed the approximate US conversions.
Serves: 6
Prep time: 3 hours
Cooking time: 15 minutes
Rest time: 10 minutes
Ingredients:
500 grams (4 cups/17 ounces) strong white bread flour (I used King Arthur)
5 grams (1 3/4 teaspoons) instant or active yeast
10 grams (2 teaspoons) Maldon Sea salt flakes
400 milliliters water, lukewarm
For the rest of the recipe:
100 milliliters (1/3 cup) olive oil
3 Whole Rosemary sprigs
3 Whole Thyme sprigs:
3 pinches Maldon Sea salt flakes
Instructions:
1. Grind the salt finely and mix with the flour and yeast in a large bowl. Add the water (it should be lukewarm), mix to a dough (it will be very wet and sticky) and beat vigorously by hand for about half a minute. Cover the bowl with something plastic and reasonably airtight (lid/bag/or plastic wrap) and leave to rest for about half an hour.
2. Cover the surface of the dough liberally with olive oil (oil a dough scraper and your hand as well), then use the dough scraper to spread the oil all over the dough. Scrape down the sides of the bowl, dragging oil down to completely unstick the dough from the bowl.
3. Now slide one hand right under the middle of the dough (your fingers must come out the other side) and lift the dough. It will stretch down either side of your hand - hold it for as long as you can without the top tearing, then put it down. The dough must always stay the same way up. Turn the bowl by one-sixth and repeat.
4. Do this a further four times (six times in total). The dough will strengthen noticeably each time and should be really smooth and rounded by the last turn. Cover and leave to rest for half an hour. Repeat this process every half hour, two more times, reducing the added oil each time so that the dough does not end up too greasy.
5. After the final half hour's rest, carefully release the dough one more time, taking care to burst as few bubbles as possible. Line a large baking sheet with baking parchment, lightly oiled. Slide the dough onto this, keeping it the same way up. Gently lift and tease the dough into an even, oval shape, without pressing or over stretching it.
6. Sprinkle dough with olive oil all over again, and leave to prove for up to an hour, when it should be really light and bubbly.
7. Pre-heat the oven to 250°C (500°F). Press finger holes all over, down to the base, no less than 2 inches apart. Scatter over small leaves and springs of rosemary and thyme, and sprinkle on a little flaky salt.
8. Bake for 7-8 minutes, then open the oven and check for browning. You may want to rotate the tray for even color.
9. Bake for an additional ten minutes. You may want to reduce the heat at some point, anywhere down to 200°C (400°F), depending on how dark you like your crust. Remove from the oven and transfer to a cooling rack.
Tip from Chef Daniel: Try to keep the dough the same way up throughout the process, after the initial mixing. You could place a poppy seed on top dead center as a marker - it should stay there right up until you bake it!